
If you’ve ever hiked to a summit and thought, “I wish this trail had just a little more spice,” then a class 3 scramble might be exactly what you’re looking for. It’s the thrilling middle ground between hiking and technical climbing—steep enough that your hands come into play, but not so extreme that ropes are always required. A class 3 scramble challenges your body, sharpens your mind, and rewards you with views and solitude that regular trails rarely offer.
But let’s be clear: a class 3 scramble isn’t a casual Sunday stroll. Exposure, loose rock, and tricky route-finding all raise the stakes. Done right, it can be one of the most rewarding mountain experiences out there. Done wrong, it can be dangerous. In this guide, we’ll unpack everything you need to know about tackling a class 3 scramble—from the risks and gear to training tips, examples of iconic routes, and how to prepare for your first real scramble.
Understanding the Yosemite Decimal System
Scrambling difficulty in the U.S. is measured on the Yosemite Decimal System (YDS). It helps climbers and hikers alike understand what they’re signing up for:
- Class 1: Easy hiking on a well-defined trail.
- Class 2: Steeper hiking, possibly with loose rock or some use of hands for balance.
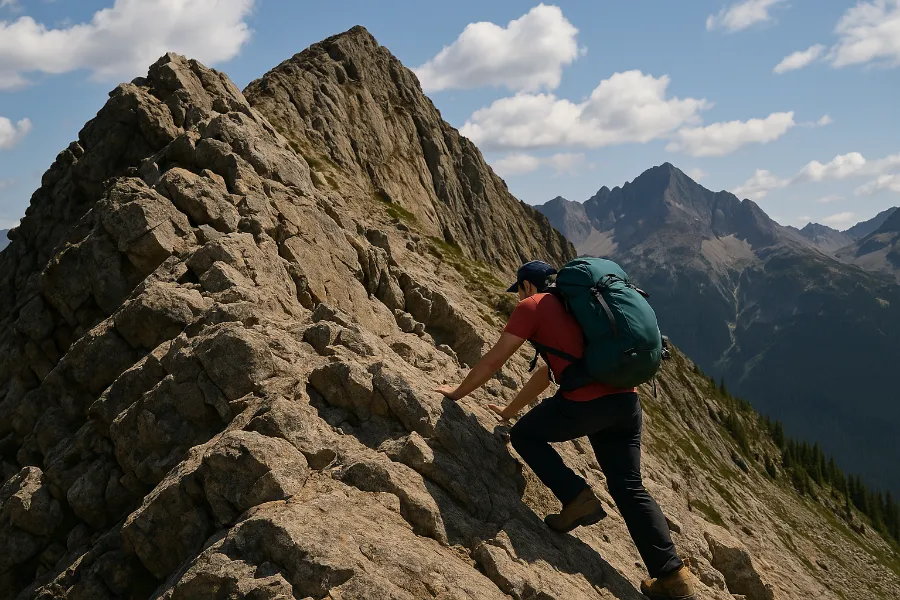
- Class 3: Now we’re scrambling. You’ll need your hands for upward progress, the terrain is steeper, and falls could cause serious injury.
- Class 4: This is where things get serious. You’re essentially climbing, and a rope may be wise. A fall could easily be fatal.
- Class 5: Technical rock climbing requiring rope, harnesses, and protection gear.
A class 3 scramble is the tipping point: technical enough to get the adrenaline flowing, but not so advanced that it requires ropes for most people. That said, conditions, weather, and personal skill can blur the line between class 3 and class 4. One scrambler’s “fun scramble” might feel like a death-defying climb to someone else. Always respect the terrain.
The Challenges and Risks of Class 3 Scrambles
The lure of a class 3 scramble is strong: airy ridges, jagged summits, and the satisfaction of pulling yourself up rock with your own hands. But the challenges are just as real.
- Exposure: At class 3, exposure becomes significant. You may be moving along ledges or ridges where a slip could have serious consequences.
- Loose rock: Unlike a climbing gym, mountains aren’t bolted together. Scree, shifting boulders, and crumbly rock demand constant testing of holds.
- Weather: Rain, ice, or even morning dew can turn a scramble into a skating rink. Wet rock makes class 3 terrain dramatically more dangerous.
- Route finding: Trails often disappear in scramble zones. Choosing the right gully or ledge is critical, and going off-route can quickly escalate the difficulty to class 4 or beyond.
- Psychological stress: Fear of heights, fatigue, or panic in exposed positions can overwhelm even fit hikers. The ability to stay calm and deliberate is as important as strength.
In short: a class 3 scramble is not just about fitness—it’s about judgment, confidence, and composure under pressure.

Essential Gear for a Class 3 Scramble
Gear can make or break your scramble. Unlike a casual hike, here you need equipment that balances flexibility, protection, and safety.
- Helmet: Rockfall is real. Whether from other climbers above you or natural looseness, a helmet is one of the smartest pieces of gear you can carry.
- Footwear: Trail runners with sticky rubber or lightweight approach shoes are favorites for many scramblers. They provide grip and agility. Stiff hiking boots may feel clunky on technical moves, though they offer ankle support.
- Gloves (optional): Some like thin gloves for grip and protection against sharp rock.
- Navigation tools: Map, compass, and GPS. Trails often vanish in scrambling zones.
- Backpack: Keep it light and compact. A heavy, swinging pack throws off balance.
- Water and snacks: Class 3 terrain is slow; budget extra time and fuel.
Skills You Need to Master
Tackling a class 3 scramble is less about brute strength and more about technique, awareness, and decision-making.
- Three points of contact: Always keep at least three limbs in contact with the rock—two feet and a hand, or two hands and a foot.
- Balance and body positioning: Keep your weight close to the rock to improve stability.
- Testing holds: Never commit to a hold without testing it first. A gentle tug or tap can save you from a dangerous slip.
- Route-finding: Learn to read terrain and anticipate where the safest line goes. Cairns, worn rock, or GPS tracks can help, but judgment is key.
- Retreating safely: Sometimes the best move is turning back. Practice down-climbing, because what you climb up, you must also climb down.
Preparation and Training
Nobody should jump straight from day hikes into a sketchy ridge scramble. Preparation is everything.
- Start small: Work your way up from class 1 hikes to class 2 routes before committing to class 3.
- Practice in a gym: Indoor climbing gyms teach you how to use your hands, trust your feet, and stay calm on vertical terrain.
- Build fitness: Cardio for stamina, leg strength for climbing, and core stability for balance.
- Train your mind: Exposure can rattle even strong climbers. Begin with hikes that have mild drop-offs or open ledges to get comfortable with heights.
- Go with experience: If possible, join an experienced scrambler or a mountaineering club for your first outings.
Beginner-Friendly Class 3 Scrambles
Not all class 3 routes are created equal. Some are well-traveled and forgiving, while others are remote, loose, and terrifying. Here are a few classic beginner options:
- Colorado 14ers:
- Mount Sneffels (South Slopes): Short approach, solid rock, and spectacular views in the San Juans.
- Longs Peak (Keyhole Route): Famous and busy, but route-finding is manageable thanks to marked paths.
- Wetterhorn Peak (Southwest Ridge): Considered one of the most fun and solid class 3 scrambles in the state.
- Kit Carson Peak (via Challenger Point): Long approach but technically straightforward if you stay on route.
- Pacific Northwest options:
- Bean Peak (Washington): A gentle introduction to exposed scrambling.
- Cashmere Mountain (Washington): Combines trail hiking with a final scramble push.
- Hibox Mountain (Washington): More rugged, but still beginner-friendly with careful route-finding.
These peaks offer the chance to test yourself in true class 3 terrain without committing to extreme exposure or technical climbing.

Safety Tips to Keep in Mind
Scrambling safely requires patience, humility, and constant awareness. Here are key principles to remember:
- Climb with a partner. Having someone to spot loose rock or help in an emergency is invaluable.
- Move slowly and deliberately. Rushing increases mistakes.
- Test every hold. Rocks shift more than you’d think.
- Save energy for the descent. Down-climbing often feels harder than going up.
- Respect the weather. Avoid scrambling in rain, snow, or when storms threaten.
- Know when to turn back. No summit is worth risking your life.
The Reward of a Class 3 Scramble
At the end of the day, why do we scramble? Because the rewards are enormous. The combination of physical challenge, mental focus, and jaw-dropping alpine scenery is intoxicating. A class 3 scramble pushes you out of your comfort zone without requiring full climbing gear. It’s the closest many hikers get to feeling like mountaineers.
Yes, it’s demanding. Yes, it’s risky. But when you top out on a jagged summit, hands scraped, legs burning, and eyes filled with sweeping mountain views—you’ll know exactly why people keep coming back for more.
If you’re ready to bridge the gap between hiking and climbing, a class 3 scramble might just be your perfect adventure. Respect the risks, prepare wisely, and savor the thrill of moving through the mountains in this uniquely human way.