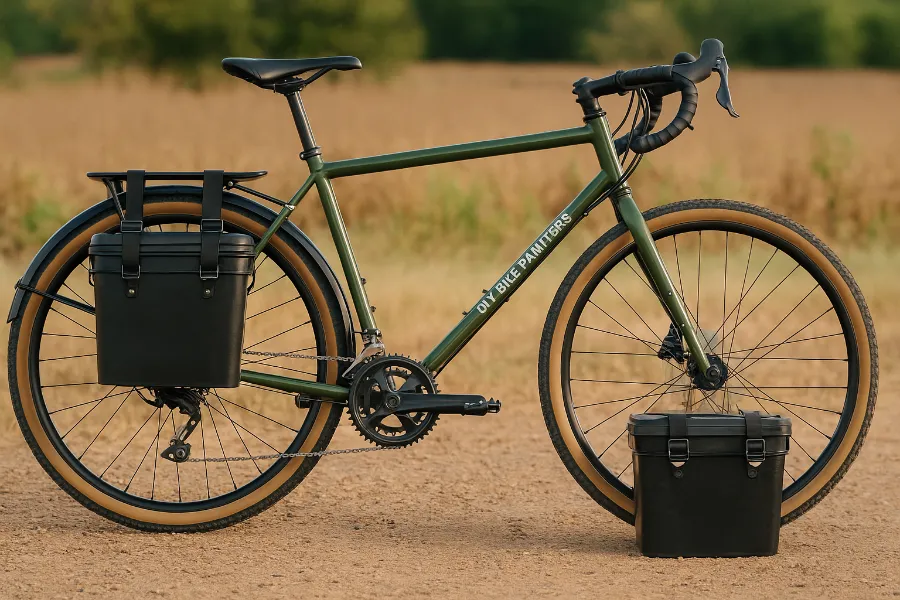
Cycling transforms the way we move through the world, but carrying gear can be a pain. That’s where diy bike panniers come in. Building your own panniers saves money, lets you customize to your exact needs, and gives you the satisfaction of rolling down the street with something you built with your own hands. Whether you’re commuting, touring, or just running errands, a set of panniers you made yourself can be a game-changer.
Choosing Your DIY Approach
There are two main routes to take when making diy bike panniers: hard-container panniers and sewn soft panniers. Each has its unique advantages, and the right choice depends on your riding style and needs.
Hard-Container Panniers
These are built from recycled or repurposed containers like plastic buckets, kitty-litter tubs, or even cereal bins. The benefits are clear:
- Rigid structure that protects your belongings.
- Waterproof by design.
- Easy to clean.
The tradeoff? They can rattle if not mounted correctly and sourcing the right container can take some luck.
Sewn Soft Panniers
On the other side, you have panniers made from fabrics like Cordura or Robic nylon. Think of them as roll-top dry bags adapted for your rack. Advantages include:
- Lighter weight and flexible packing.
- Sleeker look with customization options.
- Easier to stash when not in use.
But they take more time and skill to sew and aren’t naturally waterproof unless you use coated fabrics.
Mounting Systems: How Panniers Stay Put
No matter which style you choose, the mounting system is the heart of your pannier.
- Upper Hooks: These latch onto your rack rails and carry most of the load.
- Lower Retention System: Keeps the pannier from swinging into your wheel. Options include bungee cords, clamps, or quick-release hardware.
A good tip is to preload your mounting system—make it snug enough to prevent rattling but still removable without hassle.
Materials and Tools Checklist
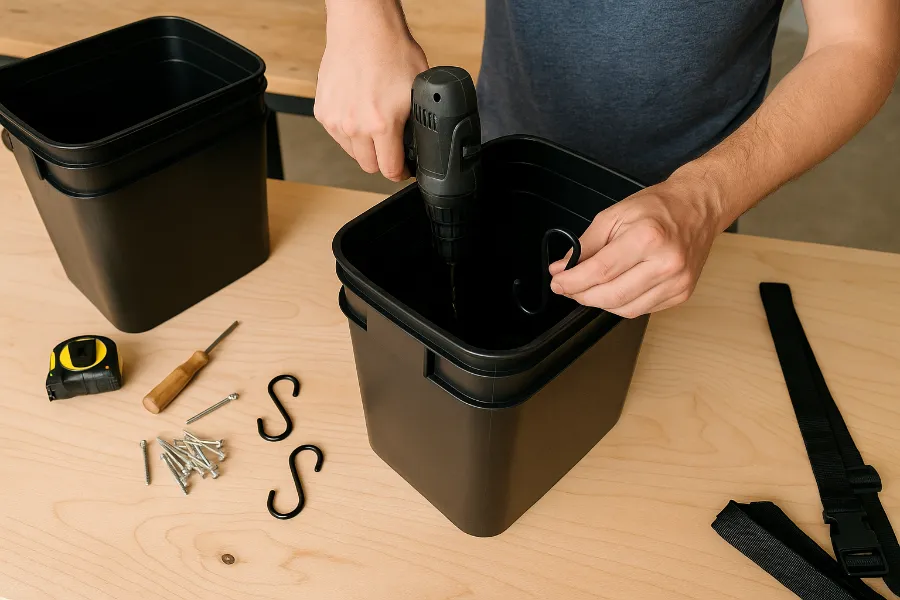
Hard-Container Builds
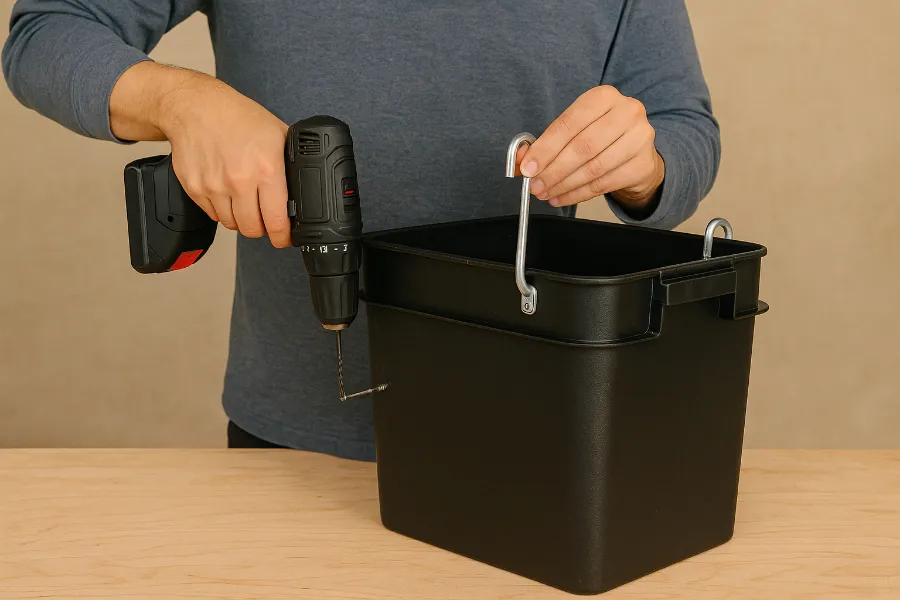
- Plastic tub or bucket
- Drill and bits
- J-hooks or pannier hooks
- Bolts, washers, locknuts
- Bungee cord
Sewn Builds
- Heavy-duty fabric (500D Cordura or similar)
- Thread (polyester outdoor grade)
- Webbing and Velcro
- Zippers or roll-top collars
- Plastic backer sheet (HDPE)
- Pannier hardware (J-hooks, clamps)
Having the right tools—like a heavy-duty sewing machine or rotary cutter—makes the job easier and neater.
Step-by-Step: Hard-Container DIY Bike Panniers
- Select Your Container: Look for tall, rectangular bins that match your rack size.
- Mark Mounting Points: Measure hook spacing to match your rack rails.
- Drill and Attach Hooks: Secure with bolts, washers, and locknuts.
- Install Lower Retention: Add a clamp or bungee hook near the bottom.
- Test Fit: Clip onto your rack and check for rattle. Adjust tension if needed.
- Waterproofing: Check lids or add weatherstripping for added protection.
Step-by-Step: Sewn Roll-Top Pannier
- Cut Fabric Pieces: Front, back, sides, bottom, and roll-top collar.
- Add Features: Pockets, reflective strips, and straps before assembly.
- Assemble Body: Sew sides to bottom, then attach the back panel with sleeve for the stiffener.
- Insert Plastic Backer: This keeps the pannier rigid against your rack.
- Install Hardware: Sew webbing reinforcements and bolt on hooks.
- Finish Roll-Top: Sew and hem the collar, then add buckles for closure.
Fit, Positioning, and Heel Clearance
A common mistake with panniers is poor placement that leads to your heels hitting the bag while pedaling. To avoid this:
- Mount hooks as far apart as possible.
- Keep panniers low but not dragging near the axle.
- Center weight evenly to avoid bike sway.
Cost, Weight, and Durability
A DIY setup can cost as little as $20–$30 in parts compared to $100+ for commercial panniers. A full sewing kit with fabric may run more but still undercuts premium brands.
- Hard panniers: Heavier but highly durable and waterproof.
- Soft panniers: Lighter, pack smaller, but need extra waterproofing care.
Troubleshooting and Pro Tips
- Use foam or packing material inside hard panniers to reduce noise.
- Source containers from recycling centers for low cost.
- Double-stitch high-stress areas in sewn panniers.
- Add reflective tape for night visibility.
- Make sure bolts are thread-locked or use locknuts to prevent loosening.
Safety, Maintenance, and Upgrades
Like any bike gear, diy bike panniers need upkeep:
- Check bolts and straps regularly.
- Keep fabric panniers clean and dry to avoid mold.
- Upgrade with shoulder straps for off-bike carrying.
- Add inner liners or dry bags for electronics.
Conclusion
Building diy bike panniers is more than just a project—it’s a way to make your cycling setup uniquely yours. Whether you go the hard-container route for rugged utility or sew your own soft panniers for a lighter touch, you’ll end up with gear that carries your load and your personality. And the best part? Every ride becomes a reminder that you built something functional, affordable, and tailored to your life on two wheels.